Appearance
Configure Azure tenant
Prerequisites
- A domain name for your organization
- An email with that domain name
Sign up on Azure
Sign up for an Azure subscription with your organization email. You will need to provide a credit card, but the required service is free; you will not be charged unless you use another paid service.
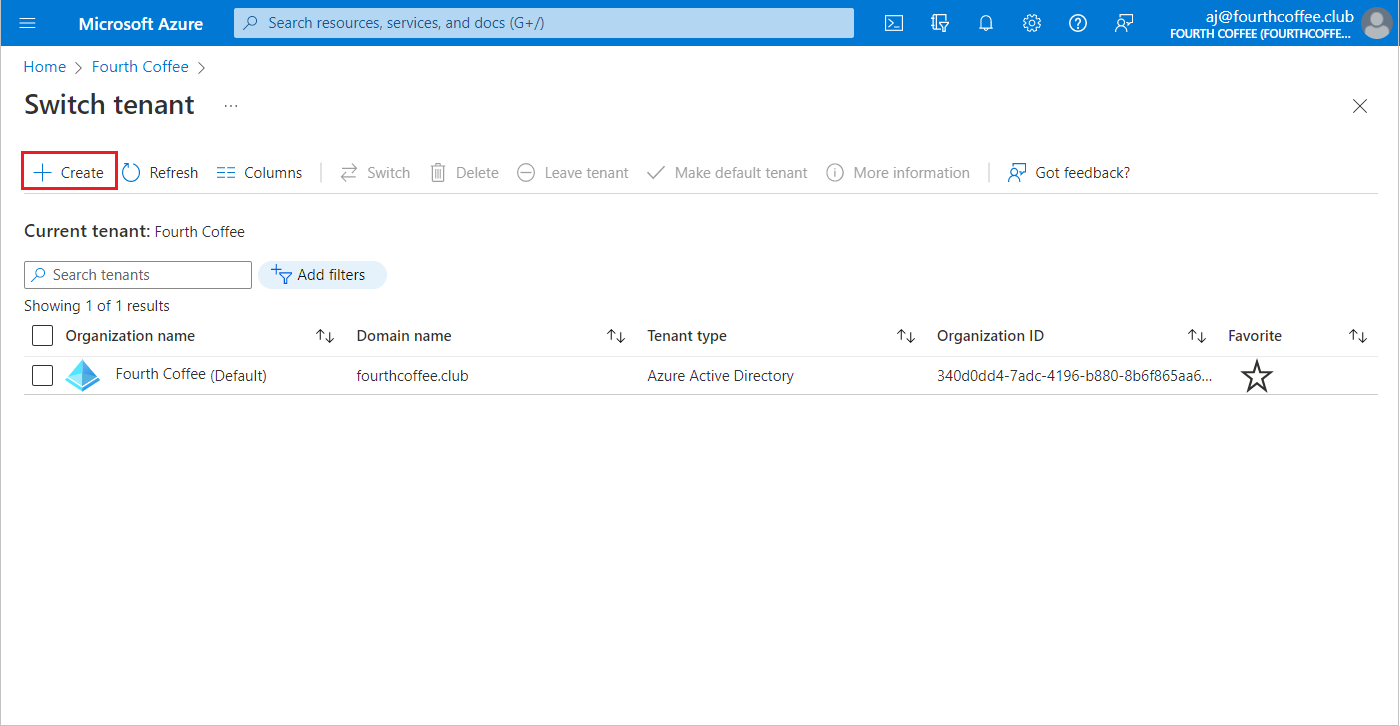
Create the Azure Entra tenant
Log in through the Azure portal.
From the Azure portal menu, select Azure Active Directory.
On the overview page, select Manage tenants.
In the action bar just below the title select Create.
On the Basics tab, select the type of tenant you want to create, most likely Azure Active Directory.
Select Next: Configuration to move on to the Configuration tab, then enter the information regarding your organization name, domain, and country. The domain must not contain the last part (.com/.net...).
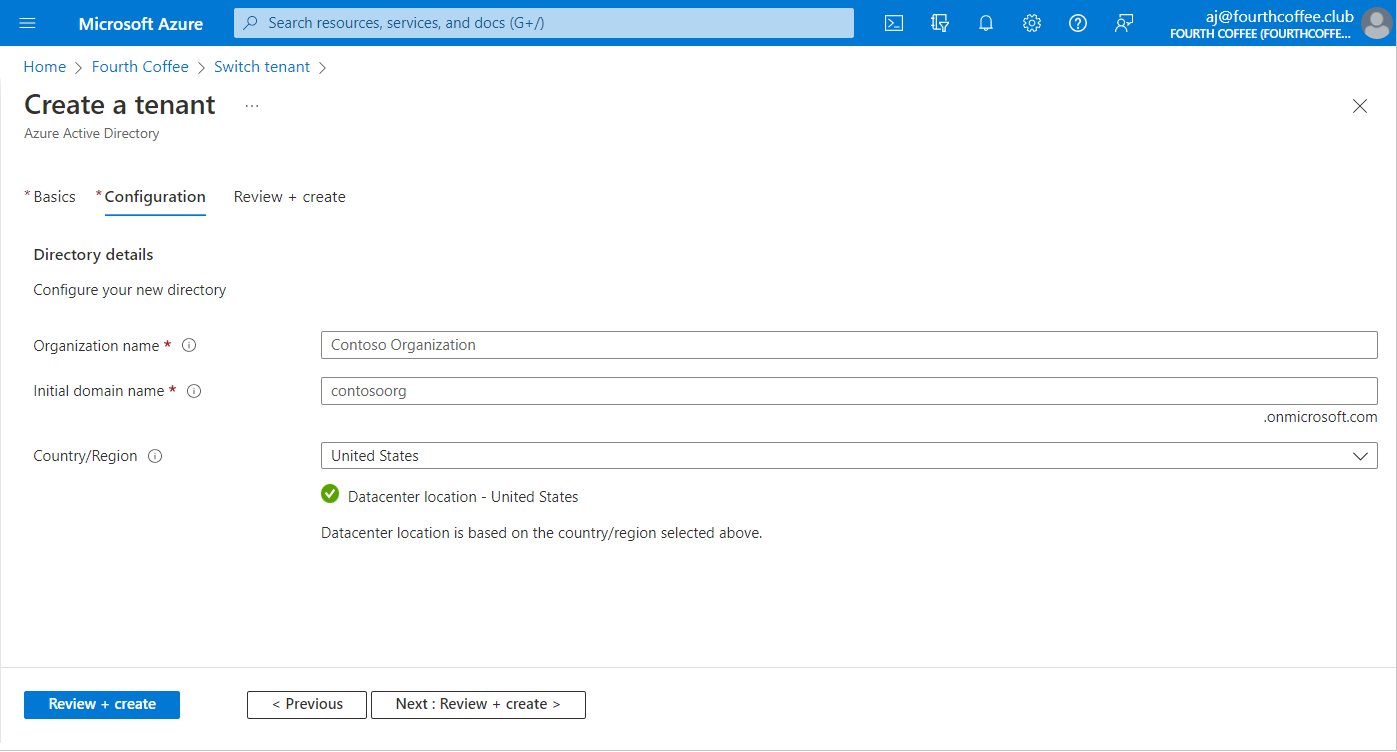
Select Next: Review + Create. Review the information you entered and if the information is correct, select Create.
This will create a tenant with the domain my-domain.onmicrosoft.com.
Add and validate your own domain name in Azure
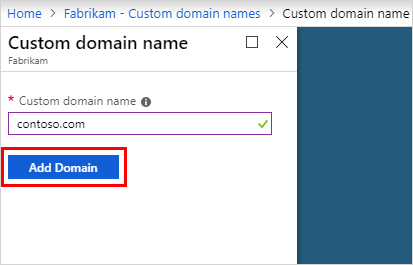
In this tenant, select Custom domain names > Add custom domain.
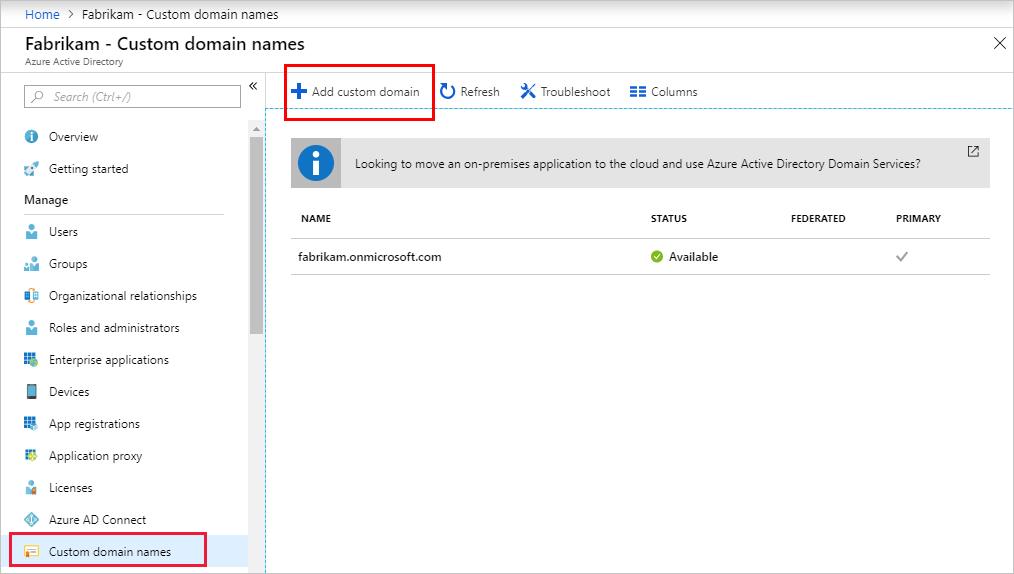
In Custom domain name, enter your organization's new name, in this example, contoso.com. Select Add domain.
The domain contoso.com page will appear with DNS information. This will be required to verify the domain and make it available in Azure.
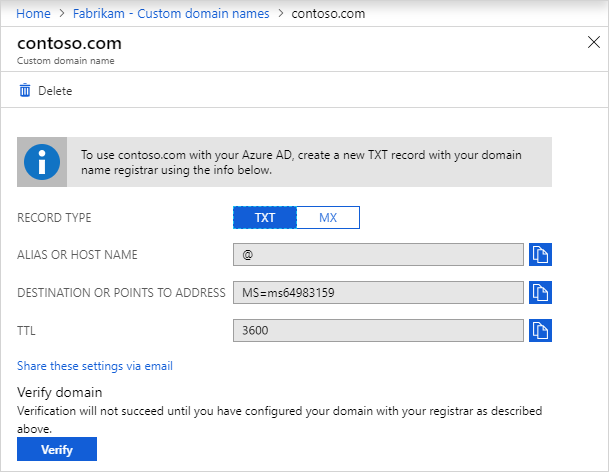
Add this DNS information to your domain registrar, set the time to live (TTL) to 3600 seconds (60 min). Then come back to the tenant and click Verify.
Create a user on the tenant
Your user should be automatically added to the tenant. You can add other users if necessary.
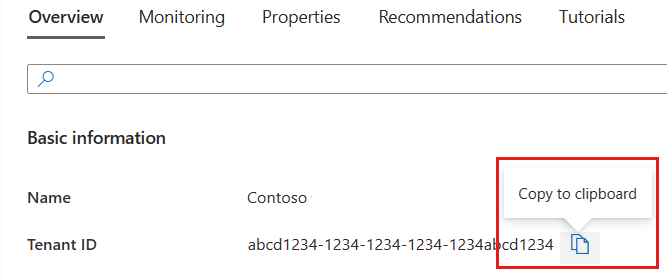
Get the tenant ID
In Datascaphe, edit your organization and copy the tenant ID from the Azure tenant detail screen and copy it in the field "Azure TenantID" of the Datascaphe Update Organization form.